

How To Deal With Tile Edges

How To Transition Between Wood And Tiles
Have you ever noticed how challenging it can be to seamlessly transition between tiles and another surface, like wood? It can be especially tricky if the two surfaces are at different heights. But don't worry, there's an easy solution! Transition strips are narrow strips of metal that bridge the gap between the two surfaces and create a smooth transition. Plus, they come in various styles and colours, so you can pick one that matches your tile and wood perfectly. That sounds like a no-brainer, right?
Installing a transition strip is pretty easy. First, you'll need to cut the strip to fit the width of the gap in your floor. Then, trim the bottom of the strip so it's level with the height of your tile. Once the strip is the right size, use a nail gun or a hammer and nails to attach it to the subfloor. Make sure you nail it in place securely because it needs to support the weight of the tile.
Once the transition strip is in place, you can start tiling like usual. Just make sure the edge of the tile is flush with the edge of the transition strip. You can use a tile saw or a wet tile cutter to make clean, precise cuts. And that's it! You're all set with your new transition strip.

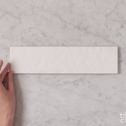
TileCloud Thirroul Matt Subway Tile
Bone Matt Subway Tile 300mm x 75mm

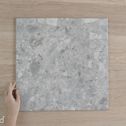
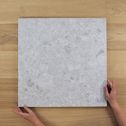
TileCloud Stirling Terrazzo Look Tile
Grey Terrazzo Look Square Matt Tile 450mm x 450mm
How to Finish Tile With Edging
Edging in tiles refers to the process of creating a finished edge on a tiled surface. This is usually done by using tile trim, which is a strip of material that is placed along the edge of the tiles to give the surface a clean, finished look. Tile edging can also be used to protect the edges of the tiles from chipping or cracking. It is an important step in the installation of tiles, as it helps to create a professional-looking finish and ensures that the tiling will last for many years to come.
One way to finish tile edges is by using edging strips. Edging strips are thin strips of material, such as metal, plastic, or wood, that create a smooth, finished edge around the perimeter of a tiled surface. These strips can cover the tiles' raw edges, creating a seamless transition between the tiles and the surrounding surfaces.
To use edging strips, first, measure the perimeter of the tiled surface and cut the edging strips to the appropriate length. Be sure to leave a small gap between the ends of the edging strips to allow for the expansion and contraction of the tiles. Next, carefully position the edging strips along the edges of the tiled surface, using a spirit level to ensure they are level and straight.
Once the edging strips are in place, use a hammer and nails or tile adhesive to secure them to the surface. Be sure to use enough nails or adhesive to ensure the strips are securely attached, as they will support the tiles' weight.
Once the edging strips are securely in place, use a tile saw or angle grinder to carefully trim the tiles to fit along the edge of the edging strips. This will create a seamless transition between the tiles and the edging strips.
Finally, use a grout float to apply grout along the edges of the tiles, ensuring to fill any gaps between the tiles and the edging strips are. Next, use a damp sponge to remove excess grout and smooth the grout lines. Once the grout has dried, your tile edges will be finished and ready to be enjoyed.
How to Finish Tile Edges With Silicon
First, let's start by explaining what silicon is and why it's a good choice for finishing tile edges. silicon is a flexible, water-resistant sealant commonly used in various applications, including around windows, doors, and bathrooms and kitchens. It is available in multiple colours to match your tiles and can be easily applied using a silicon gun.
Here are the steps for finishing tile edges with silicon:
Before applying the silicon, you need to ensure that the tile edges are clean and free of debris. Use a damp cloth to wipe down the edges, then allow them to dry completely. If the tiles are uneven or there are gaps between them, you can use a grout float to smooth them out and create a flat surface.
Once the tile edges are clean and smooth, it's time to apply the silicon. Start by loading the silicon into a silicon gun, then cut the silicon tube's tip at a 45-degree angle to create a fine line of silicon. Next, hold the silicon gun at a 45-degree angle and slowly run it along the edge of the tile. Finally, use a steady, even pressure to apply the silicon, and make sure to fill in any gaps or spaces between the tiles.
Starting at one end of the tile edge, apply the silicon by pressing the tube and moving it steadily along the edge. Try to keep the silicon bead as smooth and even as possible. If necessary, use a silicon smoothing tool or your finger to smooth out any bumps or gaps.
Once the silicon has been applied, allow it to dry according to the manufacturer's instructions. This can take anywhere from a few hours to a full day, depending on the type of silicon and the conditions in your home.
After the silicon has dried, it's time to clean up any excess silicon that may have squeezed out or dripped down the edge of the tile. Use a utility knife or scraper to remove any excess silicon carefully. Again, be careful not to damage the silicon bead or the tile itself.
Once the excess silicon has been removed, the tile edge should be smooth and professionally finished. You can then apply any grout or other finishing touches as desired.
Overall, finishing tile edges with silicon is a relatively simple process that can give your tile work a clean, professional-looking finish. In addition, you can easily complete this task independently with the right tools and patience.

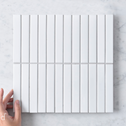
TileCloud Brunswick Kitkat Tile
White Gloss Kitkat Tile 300mm x 296mm


Glenbrook Subway Tile
Mint Gloss Slim Subway 60mm x 246mm
How To Mitre An Internal And External Corner
What is Mitering?
Mitering is a technique used in tile installation where the edges of the tiles are cut at an angle to create a seamless, continuous look around corners. This is achieved by cutting the tiles at a 45-degree angle, which allows them to fit together snugly and create a clean, finished look.
Mitering can be used on internal and external corners and is a popular choice for tiling projects because it provides a professional-looking finish without needing complicated tile trim or special tools.
You will need the following tools and materials:
- Wet saw or tile cutter
- Measuring tape
- Pencil or chalk
- A set square
- A mitre box
- A tile nipper
How To Mitre An Internal Corner
First, let's start with internal corners. When tiling an internal corner, the most common method is to use a 45-degree angle, also known as a mitre cut. This involves cutting the tiles at a 45-degree angle on both sides of the corner, creating a seamless joint between the two tiles.
To begin, measure the length and width of the corner to determine the size of your tile. Next, using a pencil and a straight edge, mark the 45-degree angle on the tile. Be sure to measure twice and mark once to ensure a precise cut.
Once the angle has been marked, use a wet saw to cut along the marked line carefully. Wet saws are power saw that uses a blade with diamond-encrusted teeth to make precise cuts in ceramic or porcelain tiles. These saws are ideal for making straight and angled cuts and can be purchased at most home improvement stores.
Once the tiles have been cut, it's time to install them in the corner. To do this, begin by applying a thin layer of tile adhesive to the corner using a notched trowel. Next, carefully place the first tile in the corner, pressing it firmly into the adhesive.
Repeat this process for the second time, and line up the 45-degree angles to create a seamless joint. Again, use a level to ensure the tiles are properly aligned and adjust as needed.


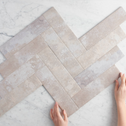
Lux Travertine Look Tile
Grey Matt Tile 450mm x 900mm

TileCloud Thirroul Matt Subway Tile
White Matt Subway Tile 300mm x 75mm
How To Mitre An External Corner
One of the most common ways to deal with tile edges is to create a mitred joint, where two tiles are cut at an angle to fit neatly in an external corner. Here's how to do it:
Measure and mark the tiles: To create a perfect mitred joint, you'll need to measure and mark the tiles accurately. Use a tape measure to determine the width of the tiles that will be meeting at the corner, and use a pencil to mark a line across the tile where it will be cut.
Use a tile cutter or wet saw: Once you've marked the tiles, you'll need to cut them to the appropriate angle using a tile cutter or wet saw. A tile cutter is a hand-held tool that uses a scoring wheel to create a line in the tile that can be easily snapped along the mark. On the other hand, a wet saw uses a diamond blade to make precise cuts in the tile.
Dry-fit the tiles: Before applying any adhesive, it's a good idea to dry-fit the tiles to make sure they fit together perfectly. Place the tiles in the corner, ensuring the cut edges meet at the desired angle. Adjust the tiles as needed until they fit together snugly.
Apply adhesive and grout: Once you're satisfied with the fit of the tiles, you can begin applying adhesive to the back of the tiles. First, use a notched trowel to spread the adhesive evenly, making sure to cover the entire surface of the tile. Then, carefully place the tiles in the corner, pressing them firmly into place.